

A creamy, dreamy peanut butter no-bake dessert that slaps every time you make it? Yes, please. If you’re craving something sweet but hate turning on the oven, you’ve hit the jackpot. This dessert comes together faster than you can say “PB powerhouse,” and it tastes like a hug in a pan.
Why this no-bake peanut butter dessert is your new best friend
Let’s be real: life is busy, and ovens can be drama. This dessert earns its stripes by assembling in minutes and chilling until firm. It’s versatile, too—perfect for potlucks, date nights at home, or a quick treat after a long day. FYI, the secret sauce is balance: peanut butter, sweetness, a salty edge, and a little crunch for texture.
The core ingredients you’ll actually use
– Peanut butter: go creamy for a smooth slice, or crunchy if you want little flavor bombs in every bite.
– Sweetener: powdered sugar for a classic taste, or a touch of honey/maple for a hint of natural sweetness.
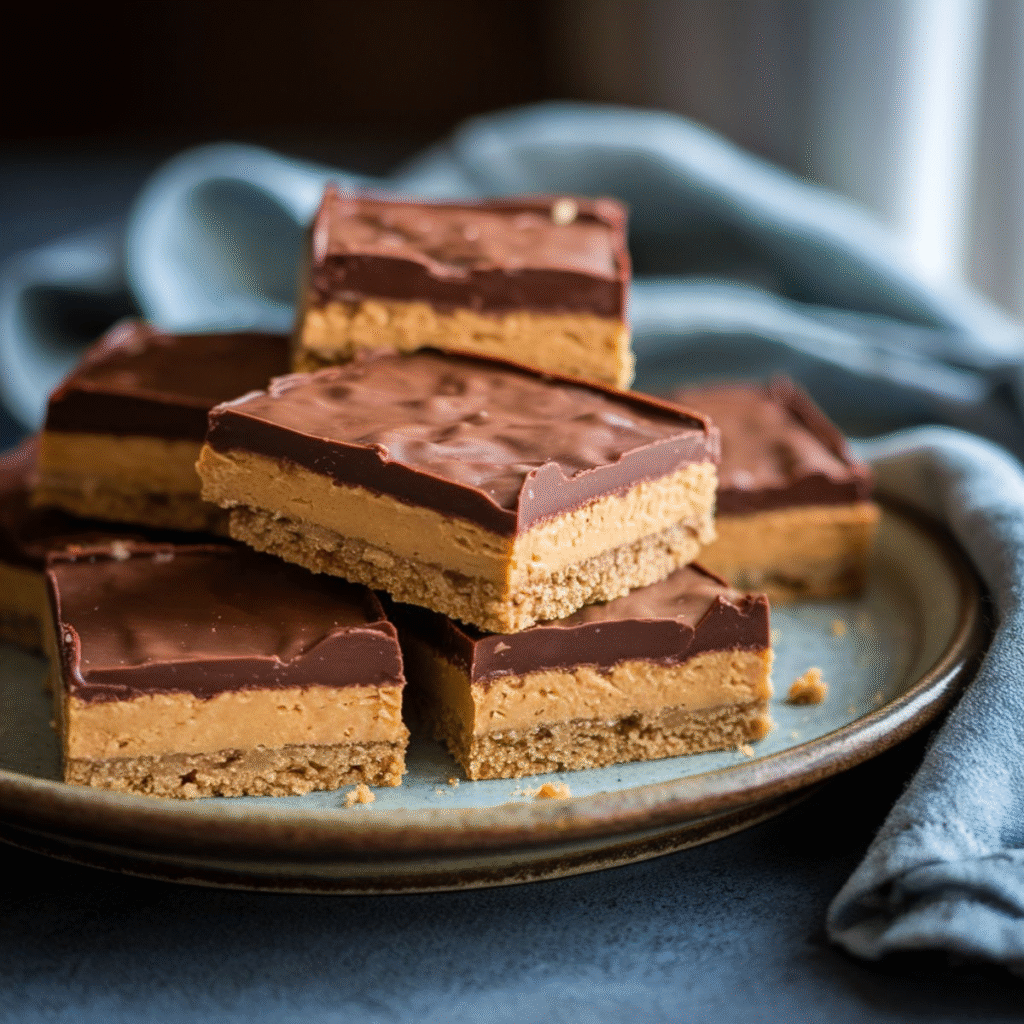
– Crust base: crushed cookies (Oreos, graham crackers, or shortbread) mixed with a bit of melted butter.
– Liquid glue: a splash of milk or cream to help everything come together.
– Add-ins: chocolate chips, chopped peanuts, mini marshmallows, or a swirl of chocolate sauce for a wow factor.
– Optional tang: a pinch of salt or a splash of vanilla to keep flavors from meandering into bland territory.
Step-by-step: how to build it without breaking a sweat
1) Crush the crust. Put cookies in a bag and crush them with a rolling pin, or blitz in a processor until they resemble fine sand.
2) Mix the crust with butter. Stir until the texture clumps when you press it. That sandy, cohesive feeling is what holds the whole dessert together.
3) Create the peanut butter layer. Mix peanut butter with your chosen sweetener and a splash of cream. Whip it until it’s smooth and fluffy—yes, we’re going for cloud PB.
4) Layer it up. Press crust into a pan to form a solid base. Spoon or pipe on the PB layer. If you want a swirl, drizzle a little melted chocolate on top and swirl with a toothpick.
5) Chill, chill, chill. Slide the pan into the fridge for at least 2 hours (or the freezer for faster firming). This is the part where the magic happens—flavors mingle, and the slice becomes sliceable.
6) Slice and serve. Run a warm knife along the edges for clean cuts. Garnish as you like and dig in.
Texture talk: what you want and what to avoid
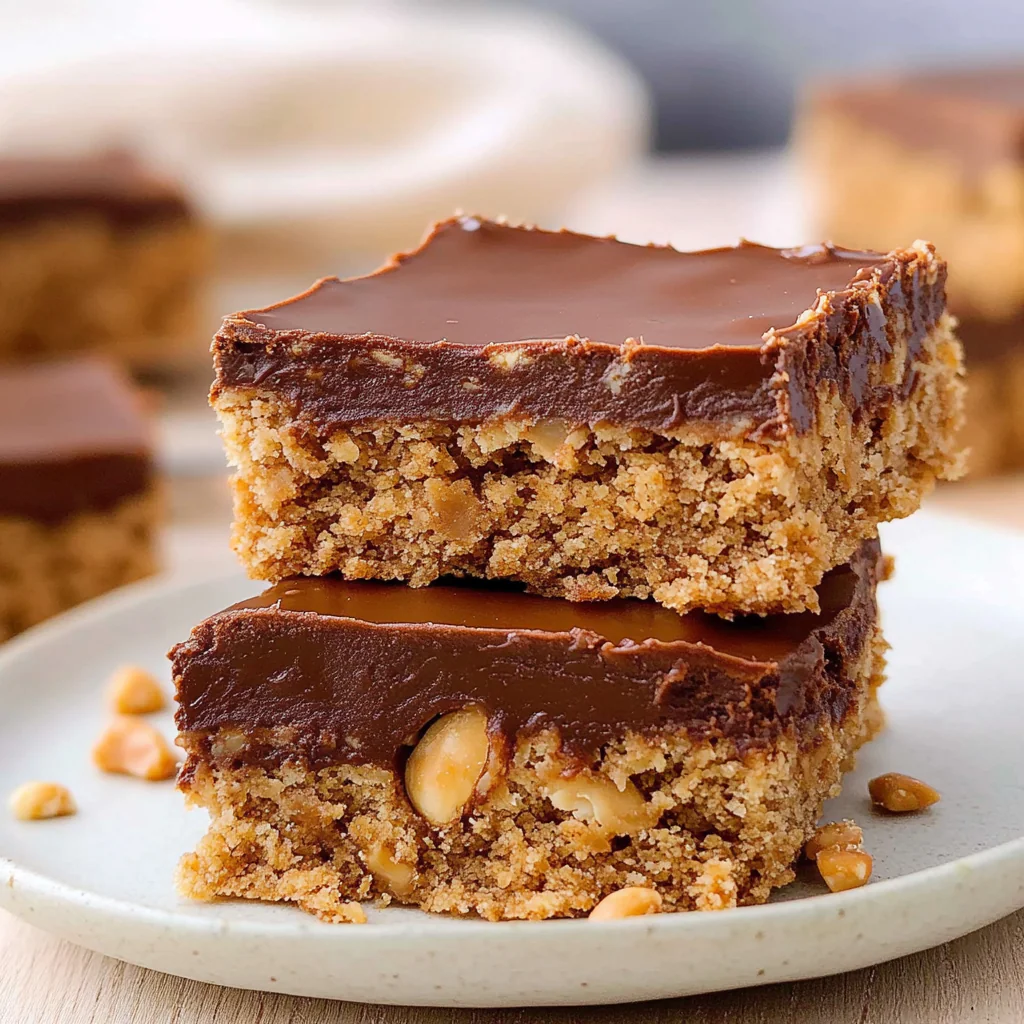
– Some crunch is glorious. If you use a crunchy peanut butter, you’ll get natural texture without adding mix-ins.
– Don’t overpower with too much crunch—crushed cookies are enough; extra nuts or pretzels can steal the show.
– For a creamy, ultra-smooth result, whip the PB mixture a bit and use a light cream to loosen it.
– If the filling feels too loose, add a bit more crushed crust or a touch of cream cheese for body (optional, but delicious).
Flavor hacks: little tweaks that elevate the dish
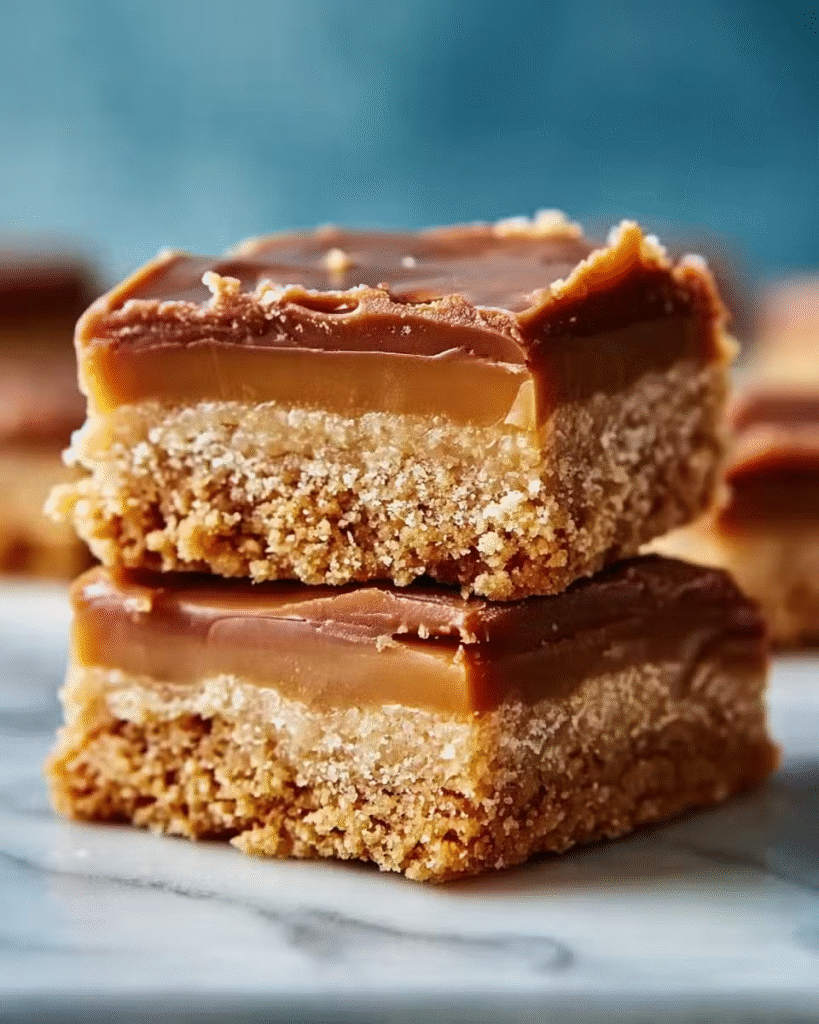
– Salted caramel swirl: drizzle a ribbon of caramel on top before chilling for a salty-sweet surprise.
– Chocolate lovers unite: layer with a chocolate ganache on top or fold mini chocolate chips into the PB filling.
– Banana boost: thinly slice ripe bananas and layer between PB and crust for a dessert-with-a-fruit-plot twist.
– Spice it up: a pinch of cinnamon or espresso powder can deepen the PB flavor and make it feel grown-up.
– Vegan version: swap dairy butter for coconut oil and use a plant-based cream or coconut milk; ensure your cookies are vegan too.
Make-ahead tips
– This dessert travels well to potlucks. Just keep it chilled until serving.
– If you’re short on time, freeze it for 1–2 hours to speed up slicing.
– Want to stave off ice crystals? Wrap the pan tightly and keep it in the fridge if you’re not serving within a day.
Flavor variations you’ll actually want to make
– Classic peanut butter and chocolate: top with a glossy chocolate layer after the PB, then chill.
– PB & jelly vibe: add a thin layer of your favorite jelly between the crust and PB, like a retro lunchbox dream.
– Honey roasted PB twist: swap in honey for part of the sweetener and add roasted peanuts on top for extra oomph.
– Mint chocolate PB: stir in a little peppermint extract or lieu with crushed peppermint candies for a refreshing finish.
– Cookies and dream: use a mix of cookie crumbs (Oreos and shortbread) for a luxe, multi-textured crust.
Common pitfalls and how to avoid them
– Pitfall: filling won’t set. Fix: chill longer, or add a touch of cream cheese or a bit more crushed crust to tighten the structure.
– Pitfall: crust crumbles when you cut. Fix: press the crust firmly into the pan and chill before adding the PB layer.
– Pitfall: too sweet. Fix: balance with a pinch of salt, vanilla, or a dairy layer to tame the sugar.
– Pitfall: flavor feels flat. Fix: add a splash of vanilla, a pinch of salt, or a hint of espresso to amp the PB flavor.
Serving ideas that look as good as they taste
– Slice into neat squares and dust with cocoa powder for a classy look.
– Serve with fresh berries on the side to cut through the richness.
– Add a dollop of whipped cream and a shaved chocolate sprinkle for a dessert-meets-sundae vibe.
– Make mini bite-sized portions for a dessert tray that disappears fast.
Frequently Asked Questions
Find answers to common questions
Peanut Butter No Bake Dessert That Slaps
Ingredients
– Peanut butter: go creamy for a smooth slice, or crunchy if you want little flavor bombs in every bite.
– Sweetener: powdered sugar for a classic taste, or a touch of honey/maple for a hint of natural sweetness.
– Crust base: crushed cookies (Oreos, graham crackers, or shortbread) mixed with a bit of melted butter.
– Liquid glue: a splash of milk or cream to help everything come together.
– Add-ins: chocolate chips, chopped peanuts, mini marshmallows, or a swirl of chocolate sauce for a wow factor.
– Optional tang: a pinch of salt or a splash of vanilla to keep flavors from meandering into bland territory.
Instructions
1) Crush the crust. Put cookies in a bag and crush them with a rolling pin, or blitz in a processor until they resemble fine sand.
2) Mix the crust with butter. Stir until the texture clumps when you press it. That sandy, cohesive feeling is what holds the whole dessert together.
3) Create the peanut butter layer. Mix peanut butter with your chosen sweetener and a splash of cream. Whip it until it’s smooth and fluffy—yes, we’re going for cloud PB.
4) Layer it up. Press crust into a pan to form a solid base. Spoon or pipe on the PB layer. If you want a swirl, drizzle a little melted chocolate on top and swirl with a toothpick.
5) Chill, chill, chill. Slide the pan into the fridge for at least 2 hours (or the freezer for faster firming). This is the part where the magic happens—flavors mingle, and the slice becomes sliceable.
6) Slice and serve. Run a warm knife along the edges for clean cuts. Garnish as you like and dig in.
Recipe from
Conclusion
This peanut butter no-bake dessert proves greatness can come without an oven and still taste like you poured love into every layer. It’s easy, flexible, and forgiving enough for kitchen beginners but tasty enough to impress seasoned sweet-tooths. So grab your spoon, gather your ingredients, and get ready to wow with something that feels indulgent without being dramatic. IMO, this is the kind of dessert you’ll reach for long after the last bite of dinner—because honestly, life is short and peanut butter is forever. If you’re stubbornly chasing the next flavor wave, FYI, you’ll still keep coming back to this classic PB magic. Enjoy!
Want a printable PDF version?